General Workflow settings
If you want to customize how Workflow's business logic works for handling work items, to customize what email notifications are sent by the Workflow, change visual settings or manage API keys for boards and account, you can do so in the Settings section.
You can find link to settings on the administration page next to the admin tabs:

This will open an additional view with settings available to configure for the current board and account (if you have account admin permissions).
Board: Configurations
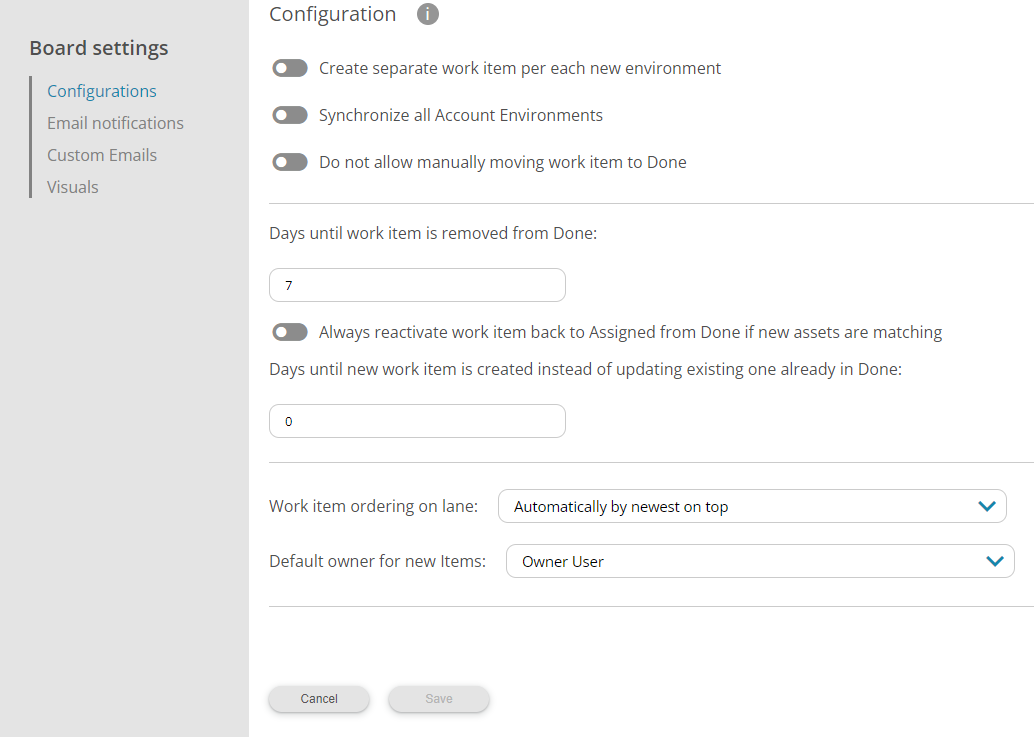
Following configuration options are available for customization:
-
Create separate work item per each new environment: By default (setting off) Workflow aggregates all matching environments for a given rule under one work item in a board from where you can manually split environments off to separate work items. Setting this option to on will cause Workflow to automatically create separate new work item per each matching environment instead of aggregating them into same work item.
-
Synchronize all Account Environments: By default (setting off) only those environments that are selected in Environment administration are used in current board. Setting this option to on will make all available environments to be used under current board.
-
Do not allow manually moving work item to Done: By default (setting off) user can change items status to Done by dracking it to the Done lane or using action button. Setting this option to on will cause Workflow to disable these features.
-
Days until work item is removed from Done: By default work items moved into Done - and not re-activated afterwards - will be cleaned up and removed by Workflow after it has been in Done lane for 7 days. If you want to make this time shorter or longer, you can enter a new number of days before automatic removal.
-
Always reactive work item back to Assigned from Done if new assets are matching: By default (setting off) Workflow will not re-activate work item already moved into Done lane if synchronization for a rule results in new environments or assets being matched relative to what assets are listed in the work item in Done, but only updates the asset references in the work item in Done lane. Setting this option on will automatically also move work item back to Assigned lane when this happens instead of keeping it in Done lane. Related setting to this setting is following Days until work item is created instead of updating existing one already in Done.
-
Days until work item is created instead of updating existing one already in Done: By default Workflow will immediately create a new - unassigned - work item against changes in asset references for a given rule, even if one in Done exists. Setting this option to more than zero (0) days will cause Workflow to postpone creating new work item and instead only update one in the Done lane (subject to previous setting Always reactive work item back to Assigned from Done if new assets are matching). Amount of days for this setting cannot exceed number of days set in Days until work item is removed from Done setting as after that number of days existing work item in Done is already removed.
-
Work item ordering on lane: By default, the Workflow work items on lanes are arranged manually. The ordering can be set to automatic based on the following fields: most assets on top, newest on top or oldest on top.
-
Default owner for new Items: Workflow will add a owner to a new work items. This default owner can be selected from the the list. In list there are all users that have either account admin rights, board admin rights or board user role is owner. If default owner is not set then Workflow will add the first user who fits the criterias in new item owner.
After you have changed any options, clicking on Save will persist the changes for the board.
Board: Data filters
If you want to apply common data filtering against all devices in the board environments before evaluating any individual rule on the board, you can add a board-level data filter. Only those devices that match the data filter defined here will be considered input to match against each rule, or if no board-level filtering is applied, then data from all devices from all environments are used.
You can create a new filter by clicking the Create button or edit an existing filter by clicking the Edit button. To remove an existing board-level filter, click on a red trashcan symbol.
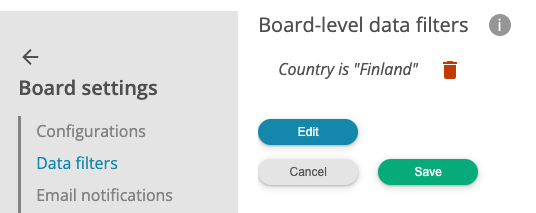
Please note that any modifications to the board-level data filter or removing it completely may potentially affect your existing work items in a board as the evaluated devices can significantly change!
Board: Email notifications
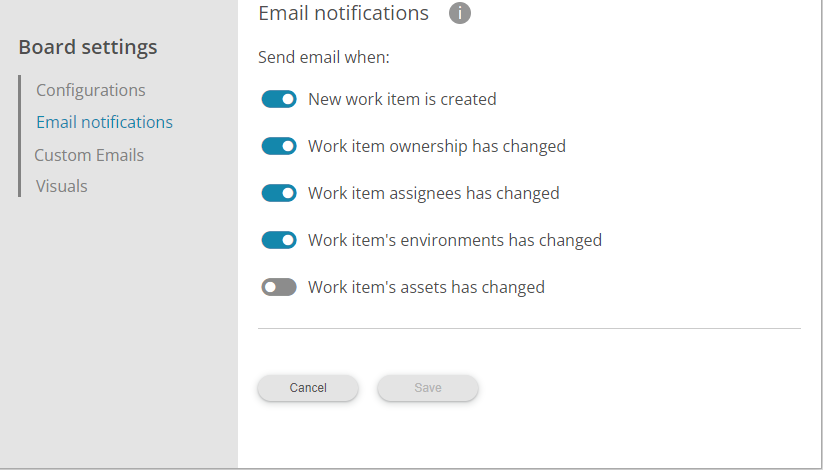
Following email notification settings are available for customization:
-
New work item is create: By default on. Email notification sent by Workflow about new work item being created into the board. This notification is sent to following user accounts: all users with owner role to board and user account assigned as work item's owner.
-
Work item ownership has changed: By default on. Email notification sent by Workflow about work item's owner having been changed. This notification is sent to following user accounts: user account assigned as work item's new owner.
-
Work item assignees has changed: By default on. Email notification sent by Workflow about work item's assignee list having been changed. This notification is sent to following user accounts: user accounts set as work item's new assignees.
-
Work item's environments has changed: By default on. Email notification sent by Workflow about work item's matching environments having been changed - either removed or added or both. This notification is sent to following user accounts: user accounts set as work item's assignees and user accounts registered as watchers for work item.
-
Work item's assets has changed: By default off. Email notification sent by Workflow about work item's matching assets having been changed - either removed or added or both. This notification is sent to following user accounts: user accounts set as work item's assignees and user accounts registered as watchers for work item.
After you have changed any email notification settings, clicking on Save will persist the changes for the board.
Board: Custom Email notifications
It is possible to create custom emails to be sent if certain events occur in Workflow items. These customised emails are listed in Custom Emails list. You can add new email configuration by clicking Add button at the bottom of the list.
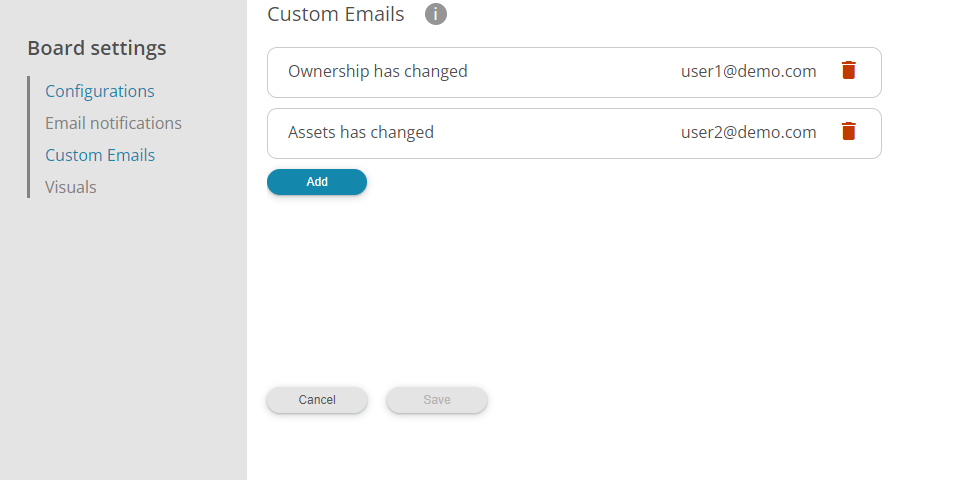
In Add new Custom Email configuration view you can define the event, content and the recipient of the sent email.
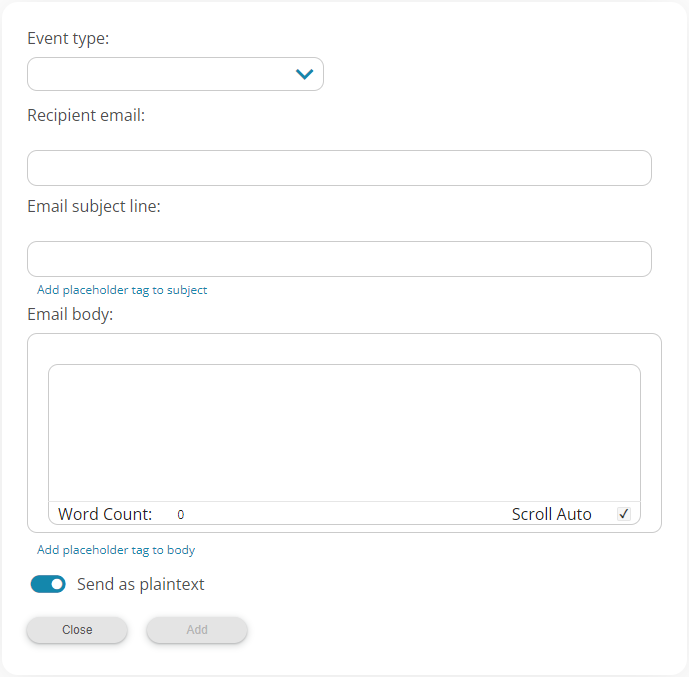
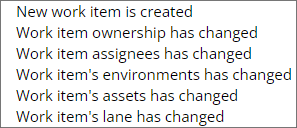
Event types
In email subject and body fields it is possible to add Workflow specific tags that are filled with item data when email is sent. The tags are inserted into the fiels by clicking either Add placeholder tag to subject or Add placeholder tag to body links and selecting desired tag from the popup.
Subject placeholder tags:
- Work item's unique id
- Work item's creator source rule id
- Work item's board id
- Work item's board name
- Work item's name
- Work item's due date
Body placeholder tags:
- Work item's unique id
- Work item's creator source rule id
- Work item's board id
- Work item's board name
- Work item's due date
- Work item's original creation time
- Work item's description
- Work item's current lane
- Work item's current owner
- Work item's current assignees
- Work item's current watchers
- Work item's current environments
- Work item's current environments count
- Work item's current assets
- Work item's current assets, group by containing environment
- Work item's current assets count
- Work item's previous owner, if changed
- Work item's previous lane, if changed
- Work item's previous due date, if changed
- Work item's previous environments, if changed
- Work item's previous assets, if changed
- Work item's new/added environments, if changed
- Work item's new/added environment count
- Work item's new/added assets, if changed
- Work item's new/added assets count
- Work item's removed environments, if changed
- Work item's removed environment count
- Work item's removed assets, if changed
- Work item's removed assets count
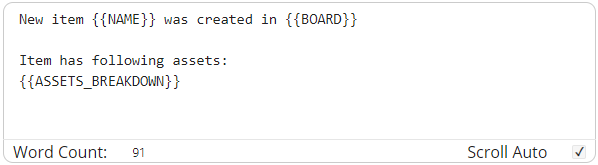
Example

Board: API keys
For programmatic access to your Workflow board, you can generate API keypairs that have specified level of access either to your board's settings and/or into board's contents. API keys created at the board level do not have any access to account level setttings or data.

All current API keys are shown in the list and by default the secret part of each key is masked to prevent shoulder surfing. You can click on the masked text to reveal it in plain text to facilitate copying.
You can modify existing API key's information by clicking on the blue edit icon at the end of the line for the key, and permanently delete the key using red removal icon.
To add new board-level API key, press Generate new keypair button.
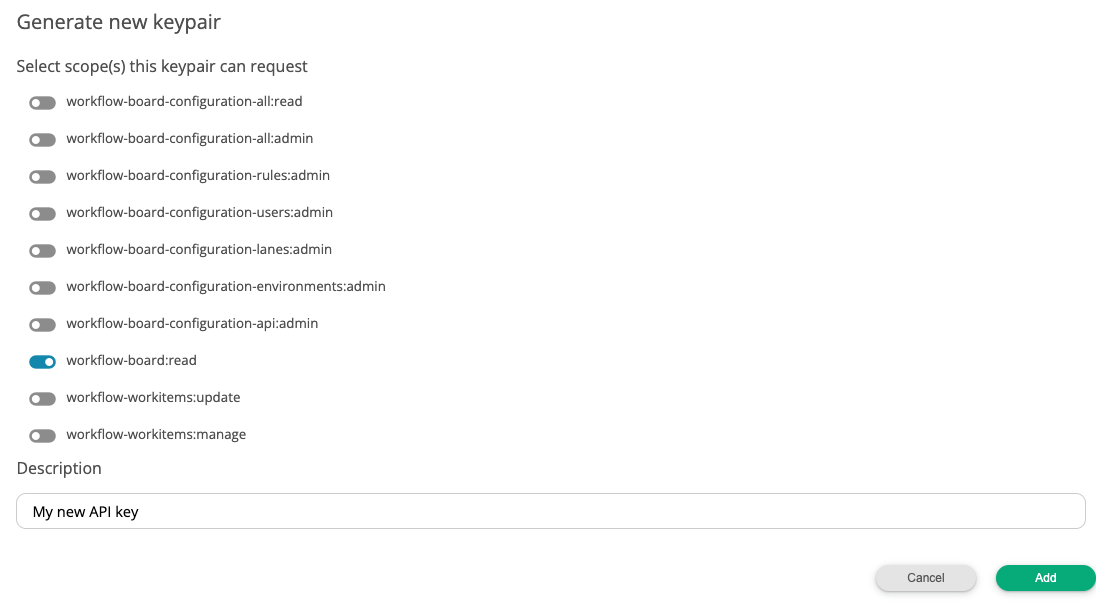
Before you can add new key, at least one scope must be selected for the key. Only those scopes that are associated with the key can be requested upon authenticating with the key so you should consider selecting the minimum amount of permission needed for API key's intended function.
You can additionally give descriptive name for your API key to distiguish its intended purpose.
Workflow API scopes and usage instructions
Plase refer to Applixure developer documentation site for documentation on the usage of the Workflow API and available scopes.
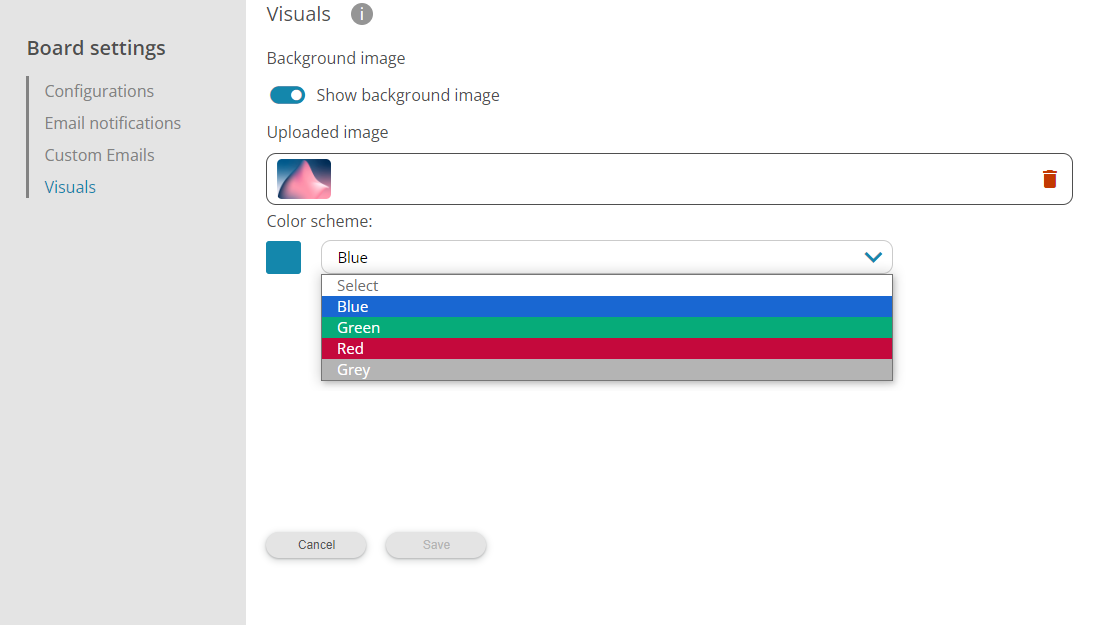
Board: Visuals
You can customize the appearance of each board to make it easier to distinguish them from each other.
There are four different colour schemas defined: blue, red, green and grey. Selected schema defines the basic colours used in user interface. Each scheme has its own background image, but you can upload your own. There is an option to set the board to have no background image at all.
Account: API keys
For programmatic access to your Workflow account and all the boards owned by it, you can generate account-level API keypairs. These are distinct from API keys owned by the board and have account-specific scopes available in addition to board-level scopes.
If account-level API key has board-specific scopes defined, those scopes are valid for all boards owned by the account. If access with scopes should be restricted only to a specific board in the account, you must use board-level API key instead.
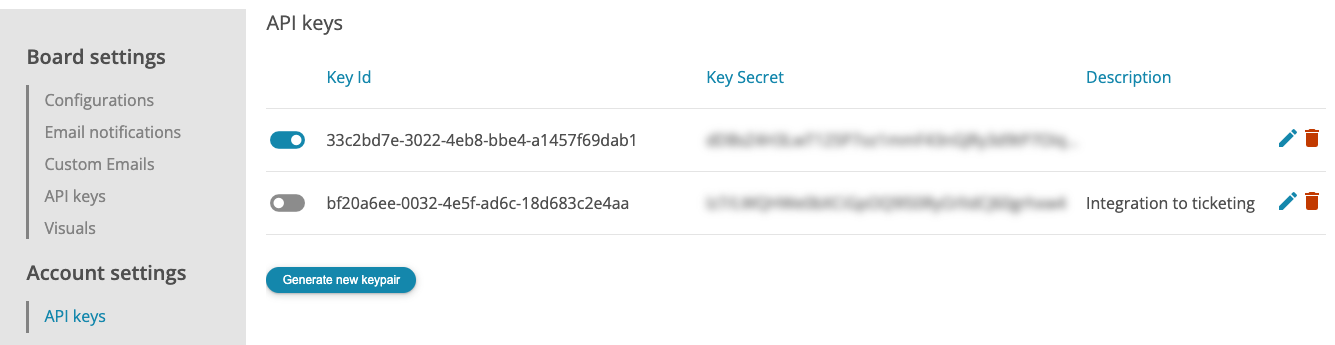
All current API keys are shown in the list and by default the secret part of each key is masked to prevent shoulder surfing. You can click on the masked text to reveal it in plain text to facilitate copying.
You can modify existing API key's information by clicking on the blue edit icon at the end of the line for the key, and permanently delete the key using red removal icon.
To add new account-level API key, press Generate new keypair button.
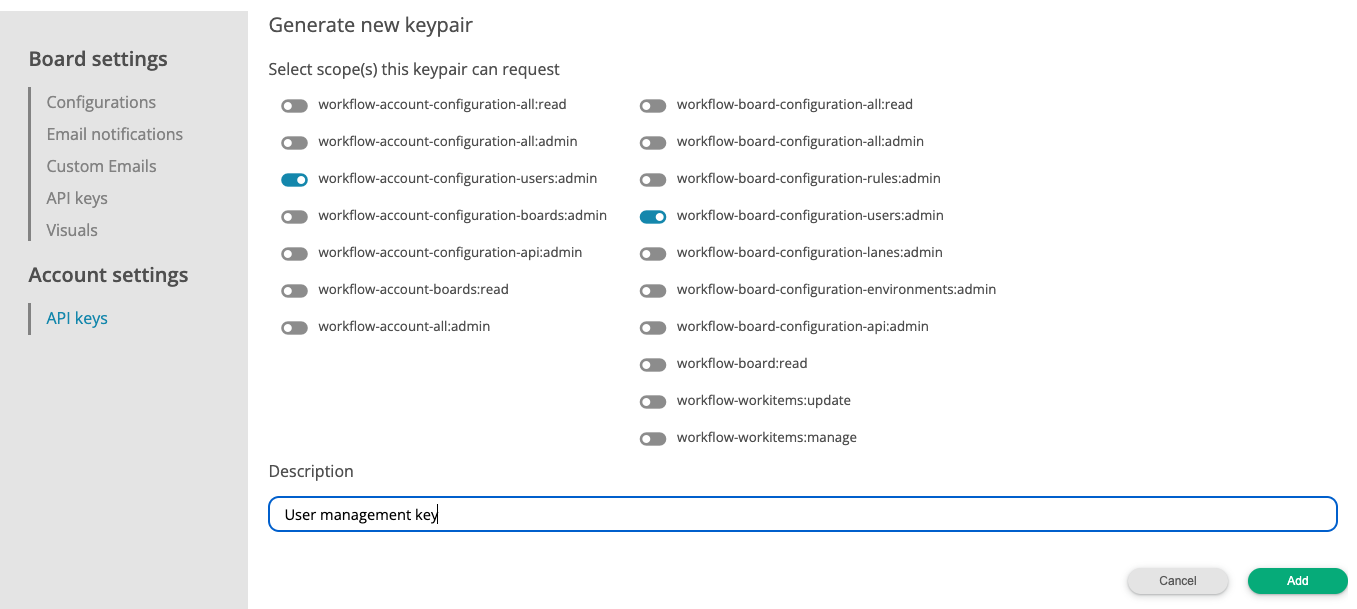
Before you can add new key, at least one scope must be selected for the key. Only those scopes that are associated with the key can be requested upon authenticating with the key so you should consider selecting the minimum amount of permission needed for API key's intended function.
You can additionally give descriptive name for your API key to distiguish its intended purpose.