Workflow rules management
Rules defined for the board drives the content that gets created in the Workflow's board.
Each rule is evaluated by the Workflow's backend against all environments data that gets synchronized from the Applixure, and work items are maintained against those environments and assets within that match the conditions in a given rule.
Creating new rule
User accounts with Admin role for board or for the overall account can create new rules or modify existing board rules from the Board administration section, under the Rules list. Initially the list of rules is empty as the content in Workflow is fully defined you and your particular needs.
There are different ways how you can create new rule:
- You can add new rule by clicking on Add button at the bottom of the rules list
- You can copy existing rule as a base for new one by clicking on Copy-icon in the rule list row
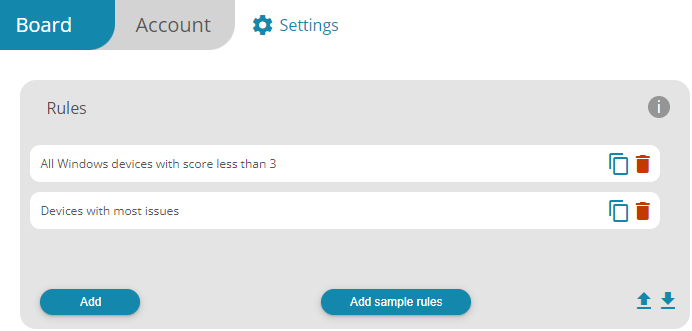
Alternatively or additionally, you can add number of sample rules that we have created for a quick start and start customizing them.
When creating a new rule, a rule editor opens for defining necessary filtering parameters that form the actual rule that is used by Workflow to match assets.
Example
As an example when going through rule's various sections, let's create a rule that includes all Windows devices with less than 3 as an Applixure device score but only if there are more than 100 devices in an environment.
Basic tab
Here you can enter basic information for name of the rule and work item's title and description:
-
Name: All rules have a name that also will be used as a title for work item created against the rule. The work item's title can later on customized to something else from the rule's name by editing an existing rule through "Item name" field that is available when editing existing rules.
-
Item description: More detailed description of the thing that the rule - and by extension the created work item - relates to that might be helpful for work item assignees for starting to fix things.
Additionally, you have possibility to override selected board-level configuration and notification settings by clicking on the Override Board settings for rule -setting link.
You can also add defenitions from prefined rule in sample rules as a base to work on by clicking Add from samples, and selecting rule from popup that opens.
Example
Enter the name for the rule that describes the rule's and work item's purpose, and optionally description if you want to have assignees for the generated work item to have better understanding what is needed of them.
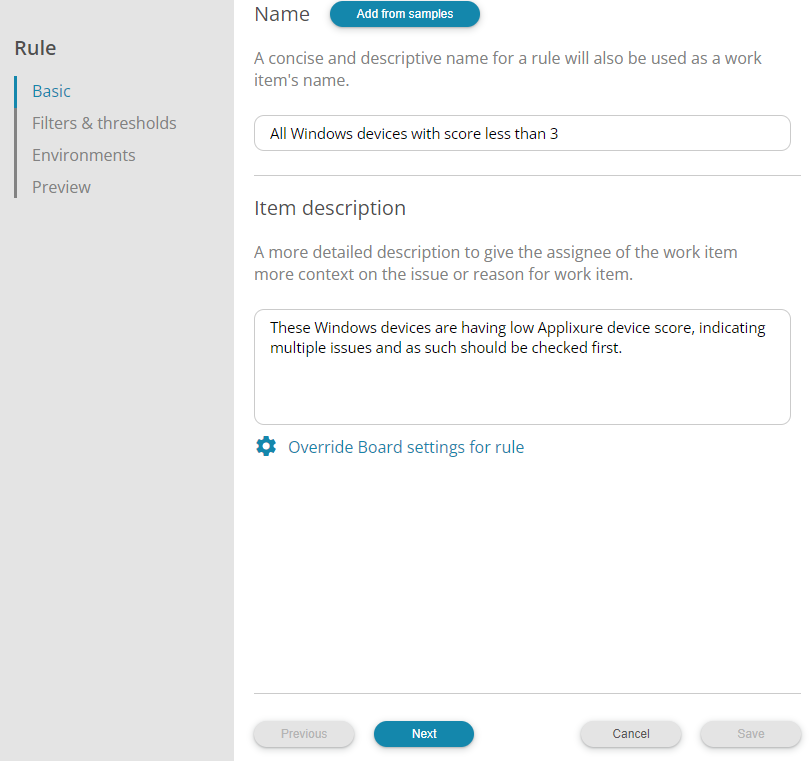
Press Next to advance to next screen.
Filters & thresholds
Filters and thresholds-step defines the actual rules which are matched against Applixure data.
There are three sections that you can define:
- Data filter
- Alert filter
- Thresholds
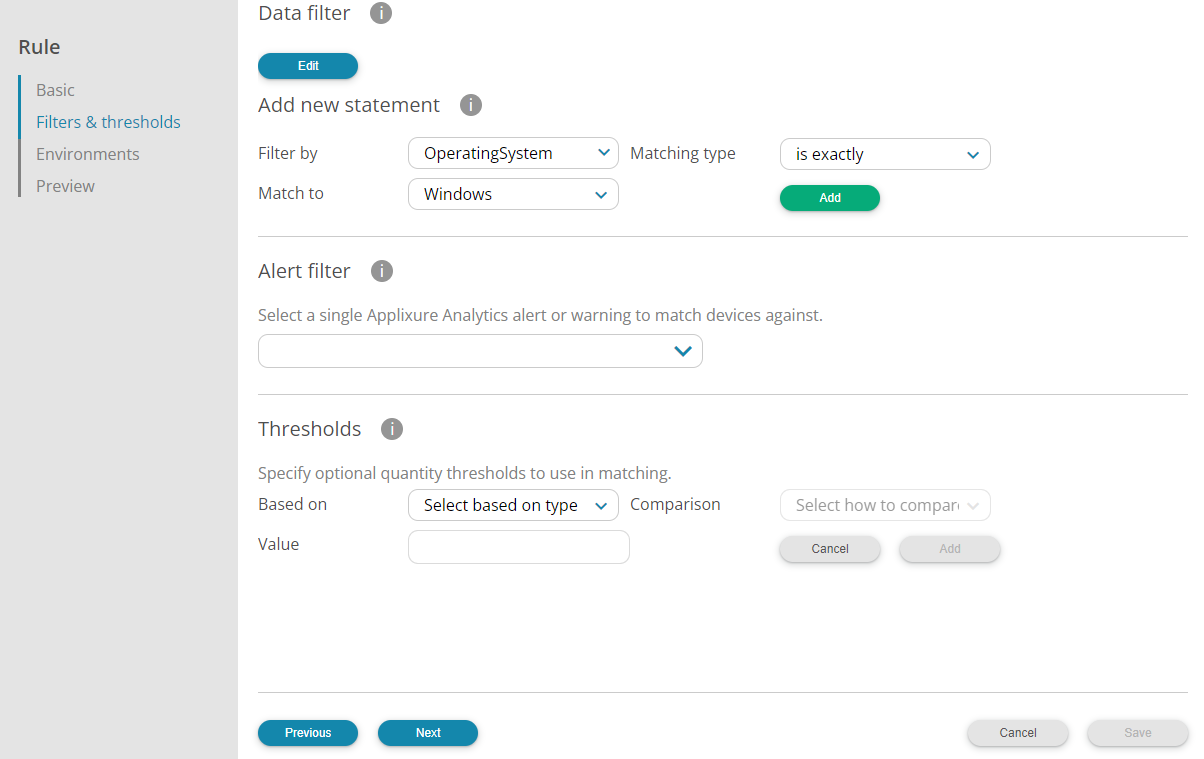
Data filter
Data filter uses same query structure and fields as is used in Applixure's device list/search or returned through Applixure Connect API. Data filter can be structured (created via editor) or manually created (simple search string)
Structured filter
Structured filter can be created by clicking the Edit-button or by adding the new statement under Add new statement-section.
- Edit-button opens the visual editor where filter can be constructed easely
- Under Add new statement You can add one or more filtering arguments by selecting a field to match information against using dropdown box containing the whole data schema of Applixure agent devices and then selecting comparison operator and value for that field and pressing Add button to add new filter line. If multiple filtering arguments are defined for rule they are all evaluated by the Workflow against devices and those matching all of the filtering arguments are then included in the work item as matching assets (all arguments are ANDed together).
Example
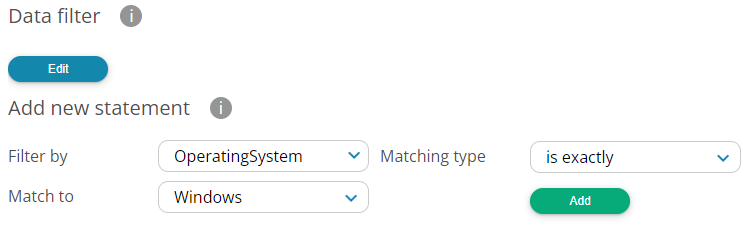
Open visual editor by clickin Edit button under Data filter-section.
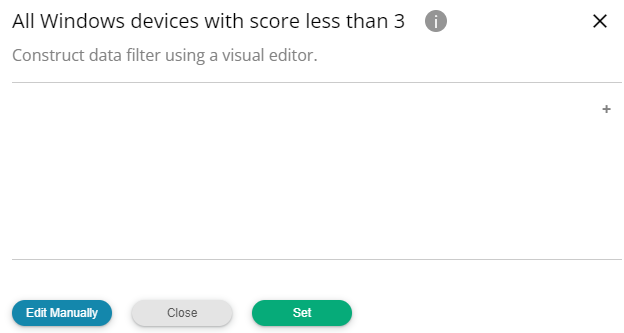
To add first filtering argument to the data filter click the + icon on the right side of the editor. This will open the field selection row, where the filtering argument can be defined.
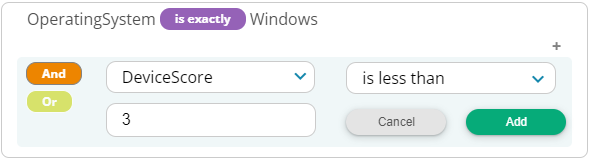
First select "OperatingSystem" as field from the dropdown list, choose "is exactly" as comparison operator (for testing equality) and select "Windows" as the value. Press Add to add this filtering argument to the list.

This will match to all devices having "Windows" as the operating system type.
Next, add additional filtering argument by clicking the + icon. At the filter argument definition box, select "And' as joining operator, select "DeviceScore" as field, "is less than" as comparison operator (for comparing value to be less than) and "3" as the value. Press Add again to add this second argument to the rules data filtering list.
The data filter will now match to all devices having "Windows" as the operating system type and device score less than "3".
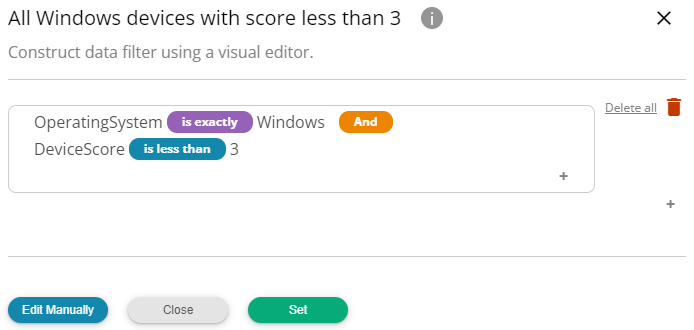
To set the newly created data filter to rule click Set button.
Manual data filter
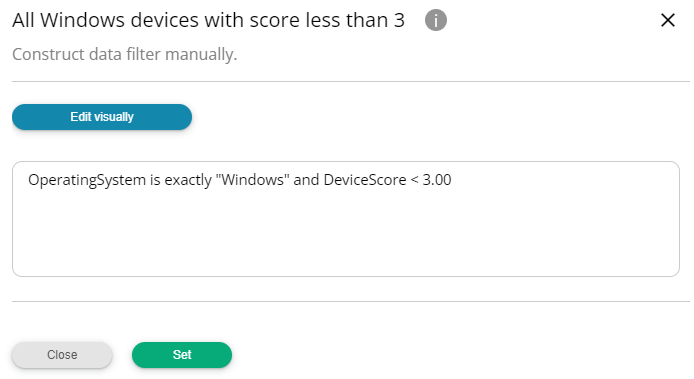
If you want to write your own filtering string, utilizing more complex expressions supported by the Applixure's search syntax, such a using functions (DAYS, IN), you can alternatively use manual filtering string as data filter for rule.
Tip
You can look at the Applixure's web UI for examples for search filter strings - all the graphs at main dashboards related to devices will lead into devices search with the filtering arguments set according to what graph part was clicked for.
As the devices search does not support all conceivable data points at the moment - such as device -related issue history - these cannot be used in the filtering as of yet but we are actively expanding the search's capabilities to include such information as well.
To edit manual data filter, open the editor by clicking the Edit button and from the editor press Edit manually button to switch into viewing filtering string. If you have already added filtering arguments using editor, manual filter is already filled with filter string based on those arguments:
Alert filter
In addition to filtering based on agent device's fields, you can also use pre-existing Applixure alerts and warnings as basis for matching devices for the work item.
You can pick one alert or warning from a dropdown list of all known Applixure alerts and warnings that will be used when matching the rule. If given device is included in active Applixure alert, it then matches to the rule.
You can also further narrow which ones of those devices should be included in the resulting work item, by using both Data filter as well as Alert filter at the same time. In this case Workflow will only match those devices that match both kind of filters at the same time. Matching is first done based on the devices listed in particular alert or warning and then further filtered down by the data filter to a subset of those devices.
Example
In the example rule we do not need to define any alert filter as the purpose of the rule was to find devices with certain operating system and having less than 3 for Applixure score. As data filter already fulfills this need, no alert filtering is required and we can leave the alert filter selection dropdown empty.

Quantity thresholds filter
Used to match rule to resulting quantity of otherwise matching devices based on Data filter and/or Alert filter.
You can add this optional filter to choose whether or not environment's matching devices should be included in the work item based on the number of matches from other filtering arguments - a meta filter on top of other filters in a way. As an example, this allows for preventing a creation of work item in case only small number of devices - out of all in an environment - matches and only surface those devices in form of work item when sufficiently large amount of devices are having the given condition.
Quantity threshold filter allows using following thresholds:
-
Absolute number of devices matching
-
A percentage of devices [out of all devices in an environment] matching
Once you have defined threshold arguments listed in the view it is possible to remove them using trashcan icon on the right-hand side of the line.
Example
First select "Number of matching agents in environment" as field from the dropdown list, choose "is greater than" as comparison operator (for testing equality) and enter "100" as the value. Press Add to add this filtering argument to the list.

This will match the rule if - and only if - number of matching devices in given environment exceeds 100.
Environments filter
If you do not want to include all your Applixure environments for a particular rule, you can further select for which environments this rule is supposed to match Data filter and/or Alert filter against.
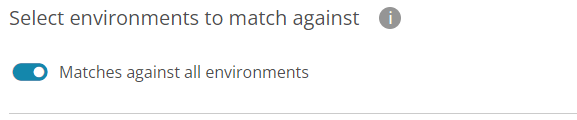
By default rules will consider all environments (and associated agent devices) for matching, but clicking on the Matches against all environments selection on this tab and then (de)selecting individual environments, from the list that opens, will limit which environments Workflow will match to the rule.
Example
In the example rule we do not need to limit any environments away and we can leave the "Matches against all environments" selection on.
Press Next to advance to next screen.
Preview
In the Preview tab you can see information about the rule being created based on the selections before saving it by pressing Save button.
Once the new rule has been added to the system Workflow will re-evaluate synchronized data within few minutes from the change, which should then result creation of new work item associated with the rule if there are any devices in any of the Applixure environment synchronized to Workflow.
Example
Review the rule details that everything is correct.
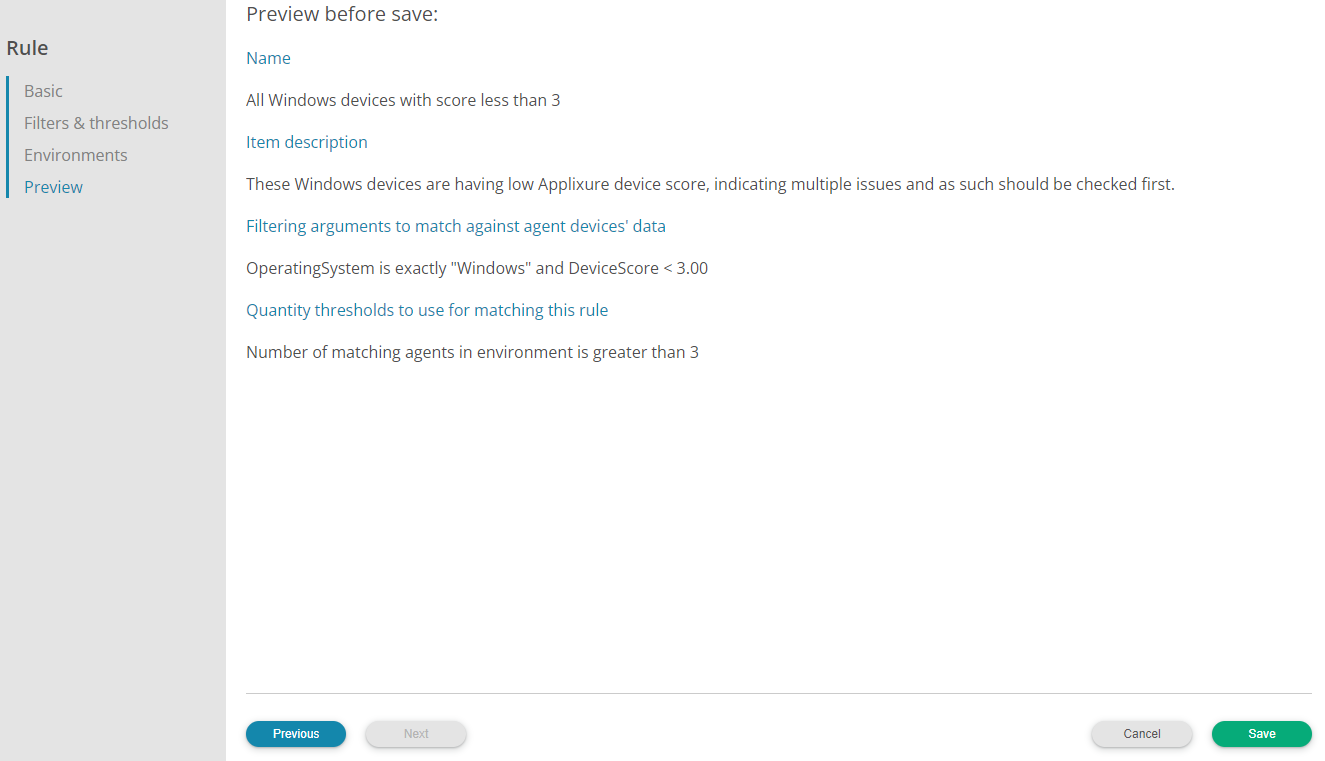
Press Save to add new Workflow rule to your board.
Editing existing rule
If you want to modify any existing rules in the board later on, you can do so by clicking on it on the list of rules.
The rule editor screens are the same as with when creating new rule but you additionally have possibility to customize the work item's title that gets created based on the rule. When creating a new rule the work item title is set in it to the same as the rule's name but by editing existing rule it can be set independently to something else.
When you make any filtering argument changes to an existing rule, Workflow will again re-match the rule against all environments devices after a short while, which should result creation of new work item or change in environment or asset composition of possibly already existing work items on that board.
Workflow will also add an entry into work item's timeline to note that the originating rule has been changed and thus the environments and devices might change for work item as a result - to distinguish any potential changes in devices due to situation in devices themselves changing:

Overriding board setting and notifications per rule
If you want to customize - or override - some of the behaviour and email notification settings for work items from what is defined at the board -level, you can do so from the individual rule that is the source for those work items.
On the Basic tab when editing a rule, you can click on the Override Board settings for rule settings link, which will open a new screen for customizing those settings for the rule.
Following configuration options are available to override on per rule basis:
-
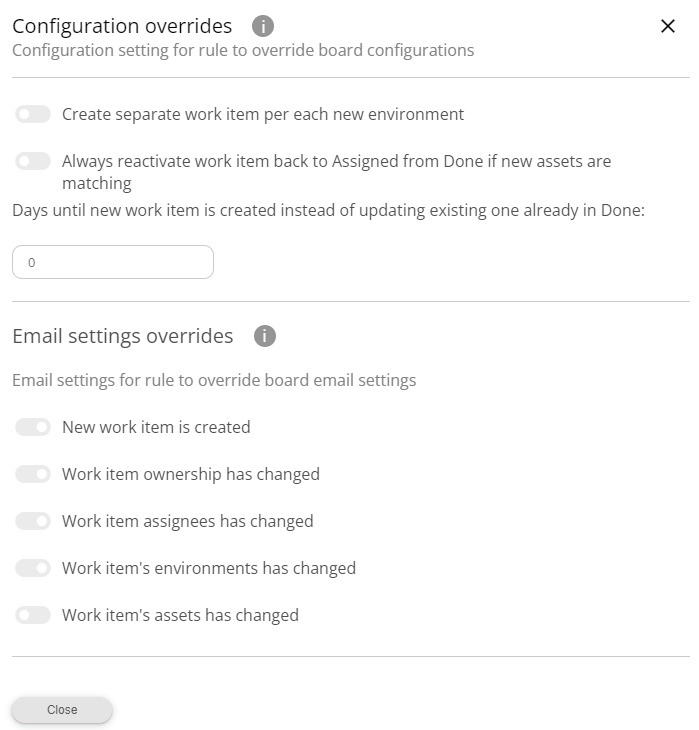
Create separate work item per each new environment: By default Workflow aggregates all matching environments for a given rule under one work item in a board from where you can manually split environments off to separate work items. Setting this option to on will cause Workflow to automatically create separate new work item per each matching environment instead of aggregating them into same work item created from this rule. Setting this option to off will cause Workflow to aggregate all environments into same work item created from this rule. Setting this option to not set uses Board's setting.
-
Always reactive work item back to Assigned from Done if new assets are matching: By default Workflow will not re-activate work item already moved into Done lane if synchronization for a rule results in new environments or assets being matched relative to what assets are listed in the work item in Done, but only updates the asset references in the work item in Done lane. Setting this option on will automatically move work item created from this rule back to Assigned lane when this happens instead of keeping it in Done lane. Setting this option to off will cause Workflow to not re-active work item created from this rule that has already been moved into Done. Setting this option to not set uses Board's setting.
-
Days until work item is created instead of updating existing one already in Done: By default Workflow will immediately create a new - unassigned - work item against changes in asset references for a given rule, even if one in Done exists. Setting this option to more than zero (0) days will cause Workflow to postpone creating new work item created from this rule and instead only update one in the Done lane (subject to previous setting Always reactive work item back to Assigned from Done if new assets are matching). Amount of days for this setting cannot exceed number of days set in Days until work item is removed from Done setting as after that number of days existing work item in Done is already removed.
Following email notification settings are available to override on per rule basis:
-
New work item is create: If set to on, email notification will be sent by Workflow about new work item being created from this rule. If set to off email notifications will not be sent for new work item created from this rule. If set to not set Board's setting will be used.
-
Work item ownership has changed: If set to on, email notification will be sent by Workflow about work item's owner having been changed. If set to off email notifications will not be sent for work item's owner having been changed. If set to not set Board's setting will be used.
-
Work item assignees has changed: If set to on, email notification will be sent by Workflow about work item's assignee list having been changed. If set to off email notifications will not be sent for work item's assignee list having been changed. If set to not set Board's setting will be used.
-
Work item's environments has changed: If set to on, email notification will be sent by Workflow about work item's matching environments having been changed - either removed or added or both. If set to off email notifications will not be sent for work item's matching environments having been changed. If set to not set Board's setting will be used.
-
Work item's assets has changed: If set to on, email notification sent by Workflow about work item's matching assets having been changed - either removed or added or both. If set to off email notifications will not be sent for work item's matching assets having been changed. If set to not set Board's setting will be used.
Info
Following table lists different visual stages of on, off, and not set for settings:
 |
Setting is on |
 |
Setting is off |
 |
Setting is not set |
After closing override settings, remember to click on the Save button the rule to persist the changes to override settings!
Removal of rule
An aready existing rule can be removed from the list of Rules by pressing the trashcan -symbol:

In doing so and if any work items exist on the board that were created from the rule, those work items won't be removed automatically by the system and they will continue staying on the board. Naturally in this case the linkage between the rule and the active work item is lost permanently and so the work item is no longer updated by the Workflow automatically with removed/added assets and environments.
Just as in case of rule being modified, Workflow adds an entry into work item's timeline to note that the work item is now orhaned and will not be updated:

You can then remove orphaned work items by moving them to Done lane and then letting Workflow's automatic removal of Done items clean them up.
Importing sample rules
To make you jumpstart in using Workflow, we also provide a sample sets of rules that you can automatically create into your Workflow -board, by pressing Add sample rules -button in the Rules list in Board administration.
Once you click it, a menu will show three sets of rules that you can add to your board list of rules:
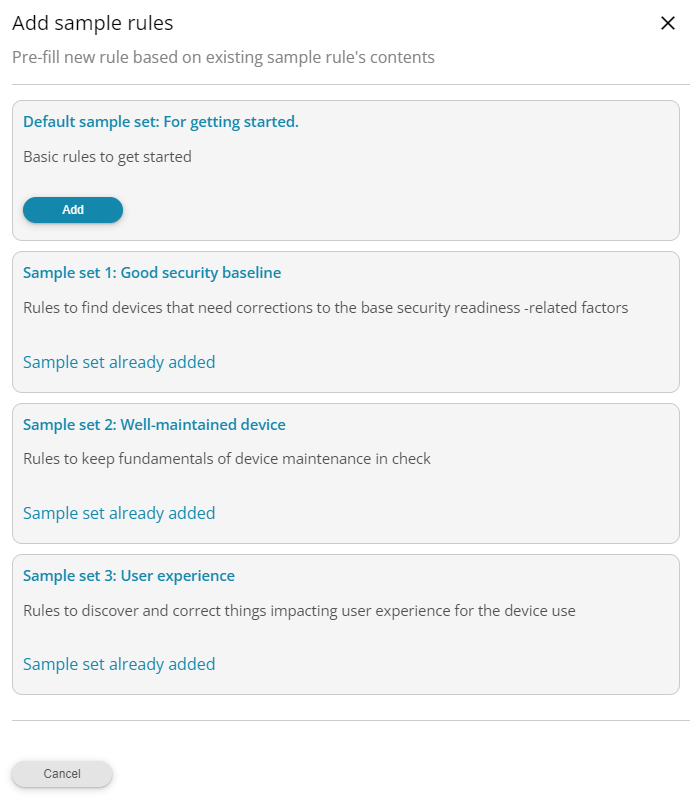
You can add rules from one or more sample category with Add button which automatically creates the rules in that set.
As these rules are meant to demonstrate how the rules are defined and are generic in nature, we encourage you to customize them further according your own requirements!